Organizations
Overview
The Organization feature allows you to separate users, roles, and resources for different teams, departments, or clients. Doing so provides better control, improved security, and simpler management, making it easier to scale your project as it grows. A default organization is already created. When users are added through IAM, they are automatically placed under this default organization.
Enable Multi-Organization
Before adding a new organization, you need to configure the feature. To configure your organization visit OS.
Add a New Organization
- Go to the Add Organization Menu.
- Click on Add Organization and give your organization a name.
- The new organization will appear in the Organizations list.
- You can rename or disable an organization by clicking the three-dot button next to it.
Organization user management
Users added in the users tab will be added to the default organization. If you wish to add users to an ogranization, you must add them through an existing organization in the organization menu.
Add Users to an Organization
- Enter the organization, go to the members tab, click on "Invite Member"
- Enter the person's email address.
- They will receive an email. They need to click on the activation link to start the sign up process.
- Upon accepting the inviation the user will appear as "Active" in the Members table.
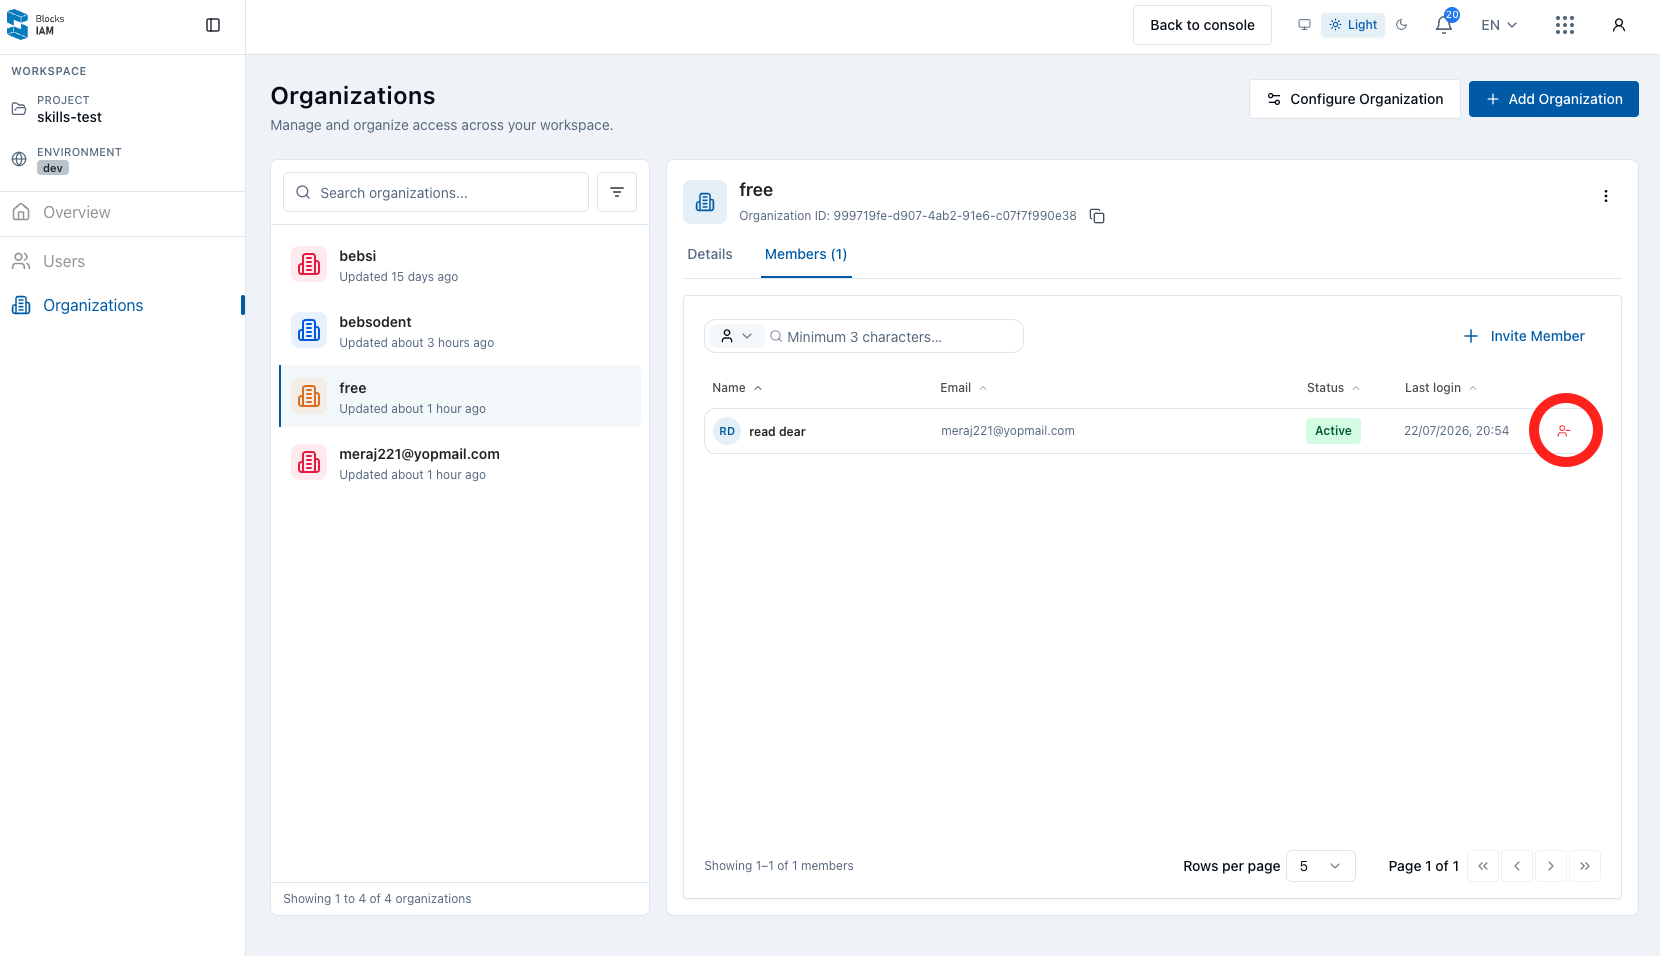
Remove Users from an Organization
- Enter an organization
- Click on the Members tab
- Click on the remove user Icon on the right end of the user's row
Roles and permissions
To manage the roles and permissions of a user.
- Enter an organization
- Click on the Members tab
- Click on the user's row
The rest of the process is exactly the same as assigning permissions to a user in the Users menu.
Switch Organization
You will be able to see a user's the roles and permissions for different organizations by clicking on the organization switcher in the user's details view.