Project Settings
Overview
Project Settings is the central place for managing a project's environments, members, repositories, and general configuration. Use it to control access, prepare deployment environments, and connect the source code needed to build and release your applications.
Navigation
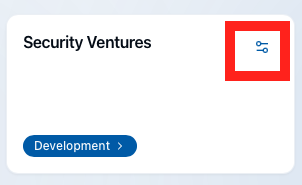
To navigate to the project settings, click on the icon on the top-right corner of your project's card in the /console page.
Environments
The Environments section allows users to access and manage the different environments within a project. Access rights and capabilities differ depending on the user's role.
Adding Environments
During project creation, the system prompts you to select the number of required environments. Select the environments you need and submit the form to create the project with those environments.
You can also create an environment by clicking on the "New environments" button on the project settings page.
Only the project Owner can create new environments. General Users can only access environments for which they have explicitly been granted permission.
If you plan to deploy using Blocks OS, the corresponding branches must exist in your repository. For example, when deploying to the Development environment, the system automatically looks for the dev branch.
| Environment | Branch |
|---|---|
| Development | dev |
| Testing | test |
| Staging | stg |
| IAT | iat |
| UAT | uat |
| Prod Shadow | prod-shadow |
| Pre-Prod | pre-prod |
| Production | main |
Deleting a Project
In order to delete a project, you must delete the environments within a project first. If you have only one environment, deleting it will delete the project as well.
To delete a project:
- Select the desired project you want to delete from the console home page
- Select the environment that you want to delete
- Navigate to the Environment Overview page by selecting it on the navigation menu on the left
- Click on the delete button in this page
People
The People section is where all project members and pending invitations are managed. It gives the owner full control over who has access to the project and what environments they can work in. General users can view member profiles but cannot make changes.
The People section displays a table listing all project members and invited users. The table includes the following columns:
- Name — The user's full name.
- Email — The user's registered email address.
- Environments — The environments the user currently has access to.
- Actions Menu (⋮) — A contextual action button that adapts based on the user's current invitation or membership status (see below).
User Profile View
Any project member can open another user's profile by clicking on their entry in the table. The profile view is organized into three tabs:
Details
Displays general account information including name, email, role, last login, browser used, and sign-up date.
Environments
Shows the list of environments the user has access to. Only the Owner can grant or remove environment access from this view. The Owner's own access cannot be modified here — they inherently have access to all environments within the project.
Invitation Status & Actions
The actions available in the (⋮) menu update dynamically based on each user's current status:
- Pending — An invitation has been sent but not yet accepted. The Owner can resend the invitation.
- Inactive (Not Registered) — The invited user has not yet registered on the platform. The Owner can resend the activation email.
- Accepted — The user has accepted the invitation and is an active project member. The Owner can transfer project ownership to this user.
Invite People
To invite people to your project:
- Click the Invite button in the top-right corner.
- Add the email addresses of the people you want to invite in the modal.
- Click Send.
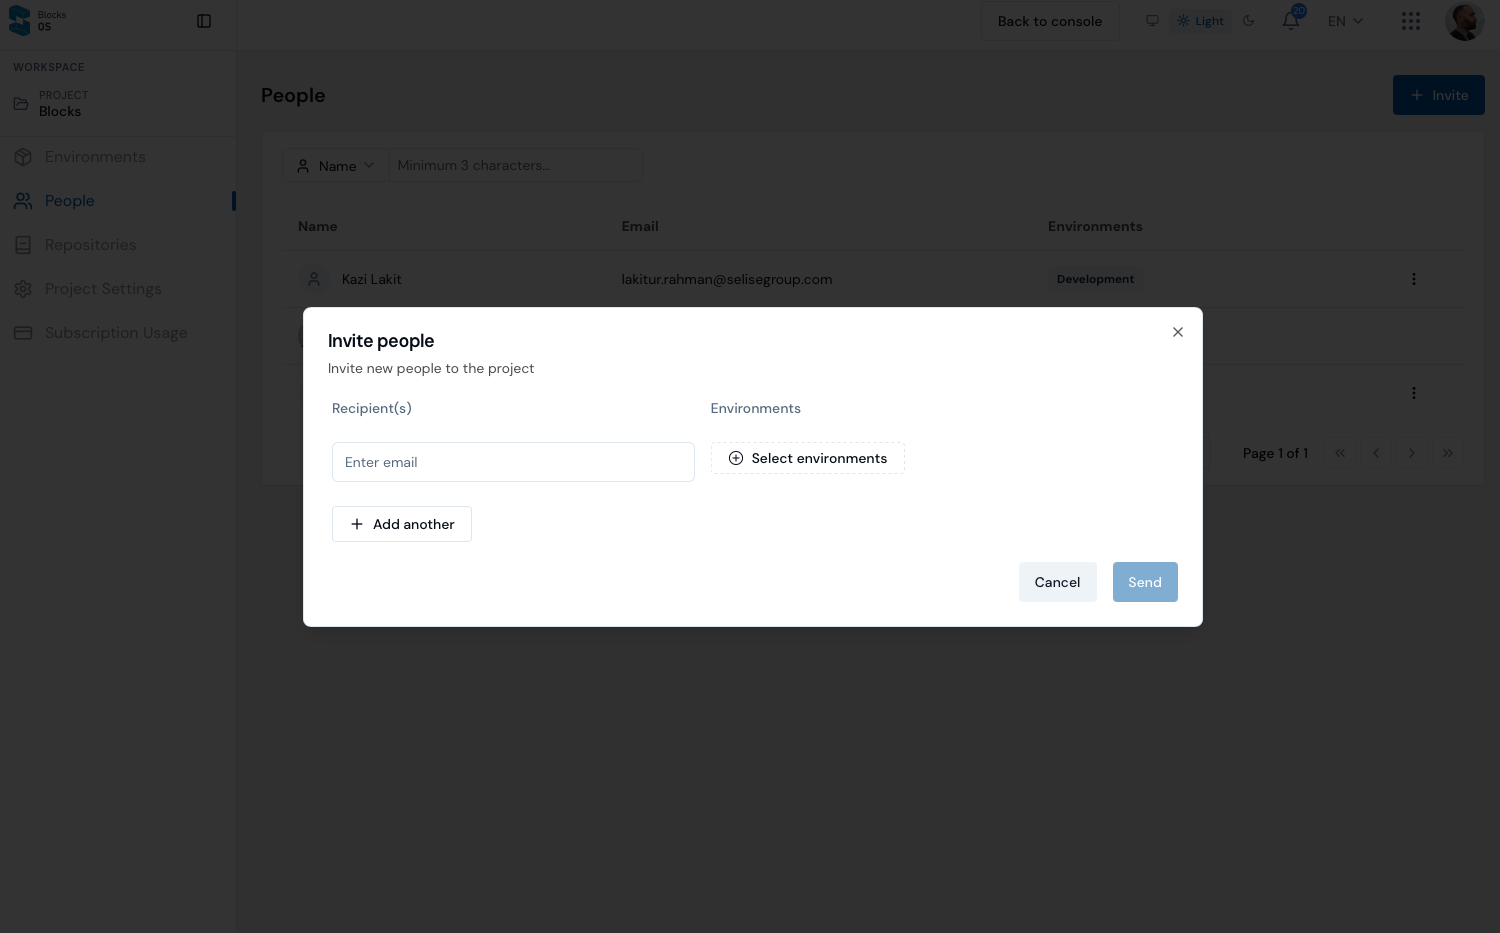
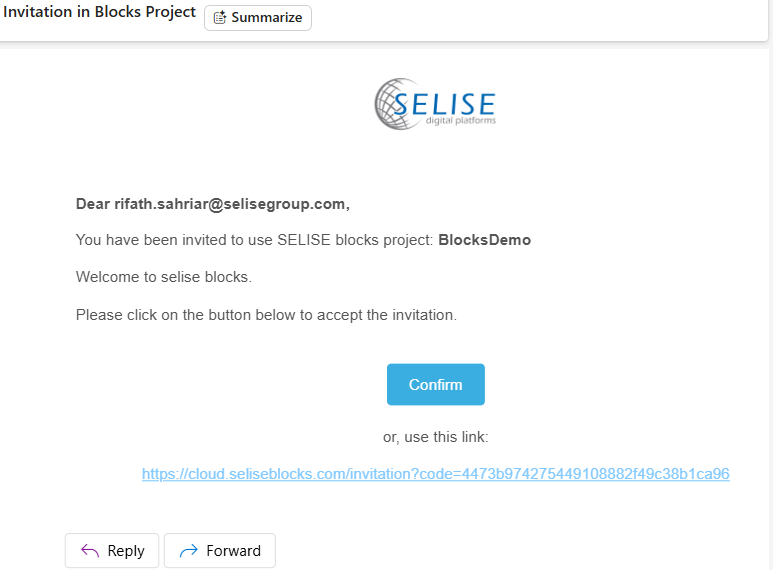
The invited users will receive an invitation email. After confirming through the email, they will gain access to the project.
Resend Invitation
If an invited person does not accept the invitation or cannot find the email, you can resend the invitation:
- Click the email icon next to the person’s name to resend the invitation email.
Transfer ownership
Users will be able to transfer their ownership of a project to another user. Click on the three-dots to expand the context menu, then click on transfer ownership.
- The selected user immediately becomes the new Owner and gains all owner-level privileges.
- The previous Owner loses owner-level privileges and becomes a general user.
- Only one Owner can exist at a time. Transfers are final unless the new Owner transfers it back.
The Owner is the only user who can perform the following actions:
- Send invitations to new users and assign environment access as part of the invitation.
- Modify a user's environment access at any time after they have joined.
- Resend invitations or activation emails.
- Transfer ownership of the project to another accepted member.
Repositories
The Repositories section allows you to connect and manage code repositories within a project. Adding a repository is required before deployment can take place.
Add a Repository
Adding a repository is optional during project creation, but it is required if you want to deploy your project using Blocks OS.
- Connect to GitHub using SSO.
- Select a repository from the list of repositories available to your GitHub account.
- Add the selected repository to the project.
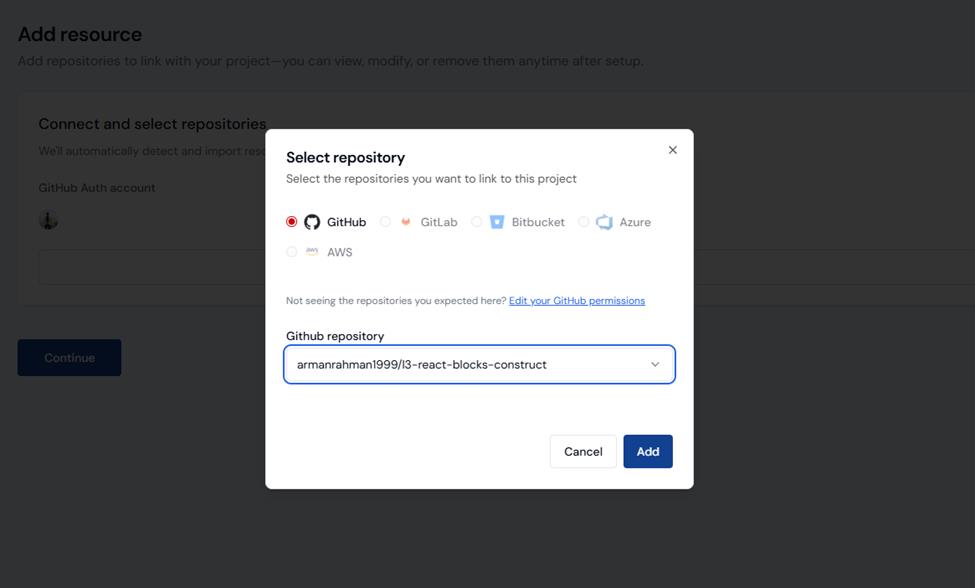
Make sure the repository contains a branch corresponding to the environment where you want to deploy. Refer to the environment and branch table above for the supported branch names.
You can revoke access to GitHub from the Select Repository modal by clicking Edit your GitHub Permissions.
Connected repositories can be used to:
- Support deployment workflows.
- Enable integration with your application repository.
- Deploy your applications.
- Deploy React-based frontend applications.
Project Settings
The Settings section displays project-level configuration details. It is visible to all project members, but only the Owner can make changes.
Information displayed in Settings includes:
- Project Name
- Additional project metadata
- Created On (e.g., 01/03/2026, 16:45)
- Plan (e.g., Free)
Only the Owner can edit the project name and other configuration fields. All other users have read-only access to this section.