Users
The Users section in IAM allows administrators to manage users, their access permissions, and login-related actions for your application.
Add a user
- Go to Core Services → IAM . → The Users tab will open by default.
- Click the Invite User button.
- Enter the user’s First Name, Last Name, and Email Address.
- Click Send to invite the user.
→ The invited user will receive an email with instructions to log in to your application.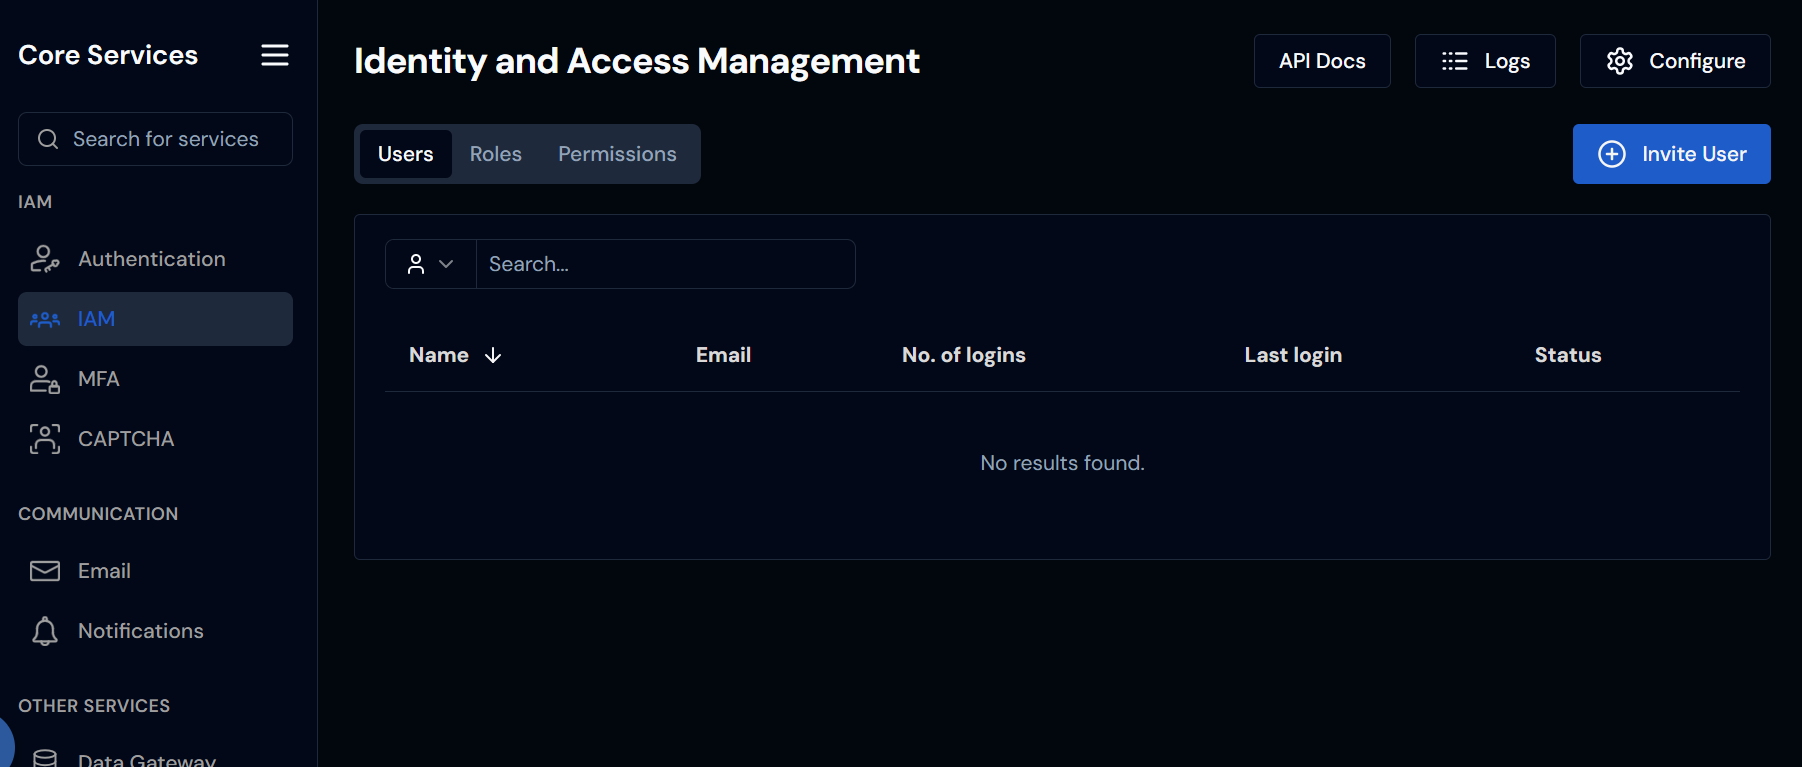
User activation flow
An invitation link is emailed to the user as soon as they are added in the IAM section. To resend it, open the user's row and click Resend Activation on the next page (also available from the three-dot menu under Edit User Details). A new activation email is sent to that user.
What happens after the user clicks the activation link depends on whether your application uses OIDC.
Without OIDC
When the user clicks the activation link, they are redirected to your application at the Account action base URL you configured. Set this in OS → Identity and Access → Settings → IAM → Account action base URL.
You are responsible for handling this redirect and building the activation page in your application. For example, if your activation page lives at https://yourapp.slsblx.com/activate, make sure your app is running and that this route is reachable.
If the activation route does not exist or the app is not running, users will hit a 404 when they follow the activation link.
The activation email uses the domain configured for your project. If you are testing on localhost, you can edit the activation URL to replace the base domain with http://localhost so the link resolves locally. See OS overview for details.
With OIDC
When the user clicks the activation link, they are taken to a portal handled by Blocks. You do not need to implement or host an activation page on your end — activation is completed within the Blocks-hosted portal.
Search and View User Information
- Use the search field to find a specific user by typing their email , first name , or last name .
- The User Table displays key information such as:
- Active/Inactive status
- Number of logins
- Assigned roles and permissions
Edit User Details
- Click on a specific user row to open the Edit Page. The Details tab will open by default.
- Click the Edit User button to update the user’s name.
- Use the three-dot menu for additional actions:
a. Resend Activation – Sends a new activation email.
b. Reset Password – Sends a password reset email.
c. Disable MFA – Disables multi -factor authentication for that user. - Click Change Image in the Details tab to upload or update the user’s profile picture.
- In the Roles table, click Assign Role to add a role (e.g., User , Admin).
- Select the desired role’s checkbox.
a. You can also use the search bar if there are many roles. - Click Include to assign the role. The change will be saved, and the user will receive a notification to log in to your application.
- In the Permissions table, click Assign Permission.
- Use the search box to find the desired permission by name.
- Select the permission and click Include to assign it. The change will be saved, and the user will receive a notification to log in to your application.
You can assign a maximum of five permissions to a single user. If additional permissions are required, create a new role that includes those permissions.
Roles and permissions must be configured separately from their dedicated tabs on the IAM landing page.
Check User History and Devices
- Go to the History or Devices tabs to view:
- Login activity
- Session history
- Connected devices
Roles and Permissions
Using Roles and Permissions with Client Credentials
Blocks OS now supports Roles and Permissions for controlling access to platform resources. When accessing Blocks OS APIs using client credentials, it is important to ensure that the credential has a role assigned and that the role includes the correct permissions.
If a required permission is missing, the access token obtained via client credentials will not include the necessary authorization, and API calls will fail.
This guide explains how to create and assign the correct permission.
Scenario
A user attempted to create a localization key via an API call. The client credential being used had a role assigned, but the role did not include the permission required to save localization keys. Because of this, the token issued through the client credential lacked the required authorization.
Below is an example of the role configuration. As shown, the permission for saving a localization key is not present.
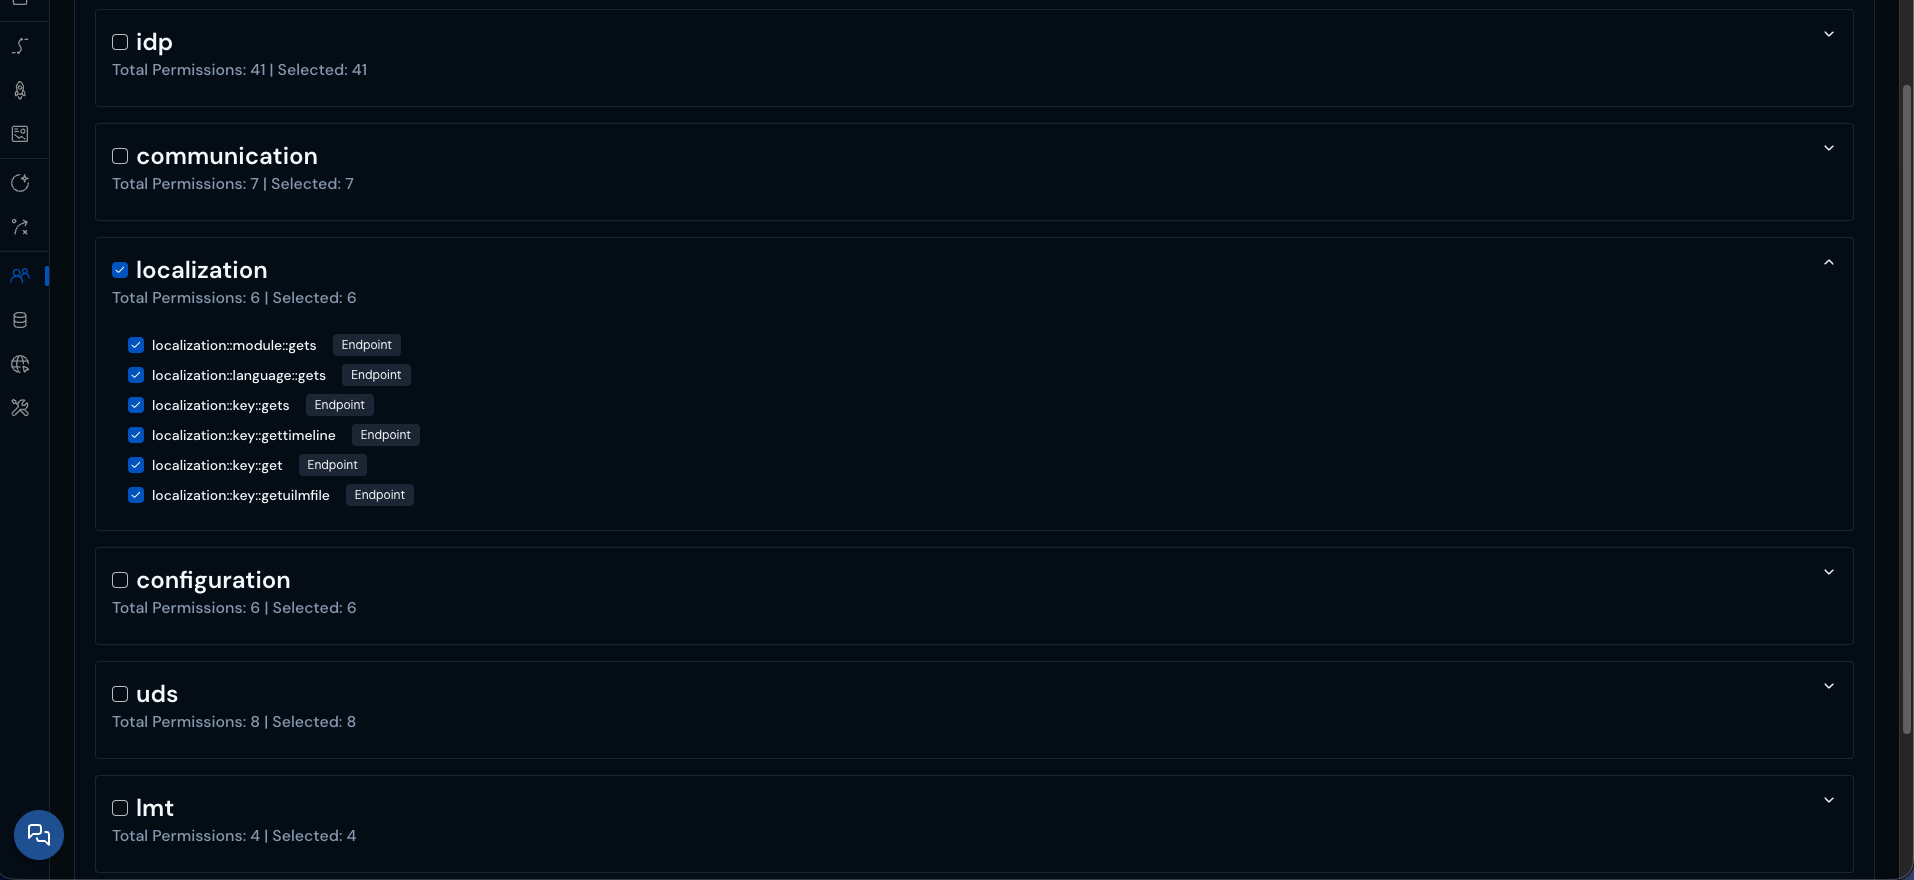
To resolve this issue, the required permission must be created and added to the role.
Creating the Required Permission
For endpoint protection, the resource name should follow the format
service::controller::name
- Navigate to Access Manager from the main menu.
- Select the Permissions tab.
- Click Add Permission.
You will see a screen similar to the following:
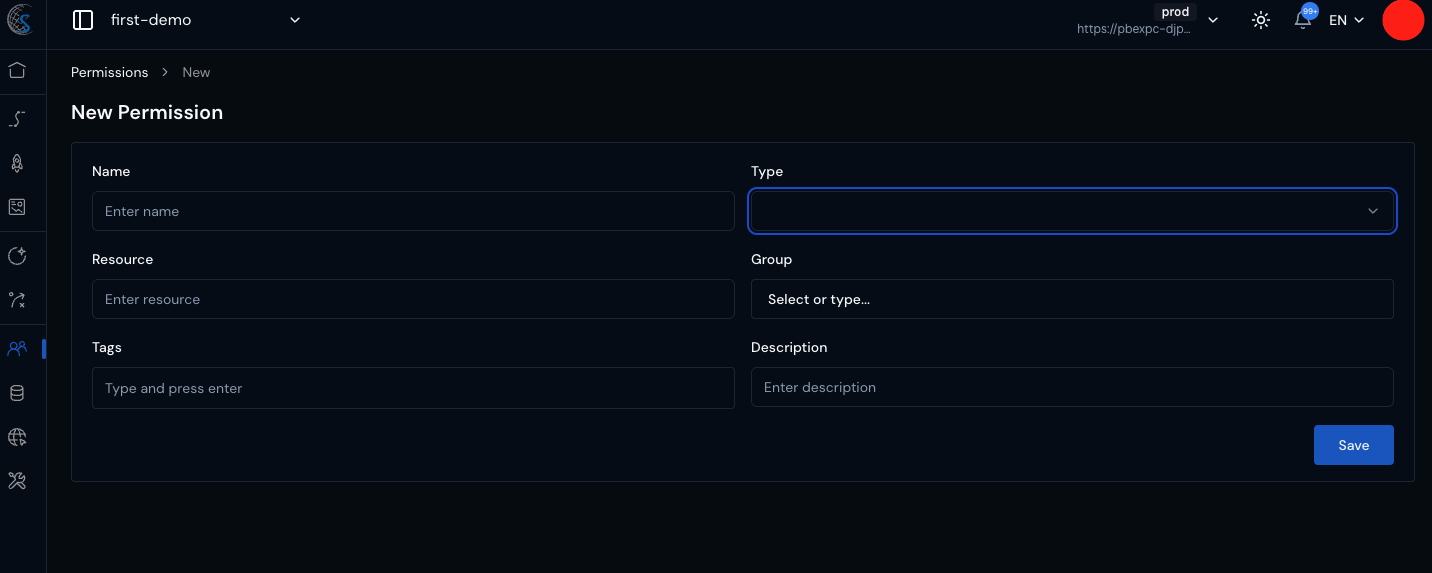
Fill in the fields as follows:
Name
Enter a name that you will recognize when assigning it to roles.
Example:
localization-key-save
Type
Select:
Endpoint
Other available types include:
- FE Action
- Data Protection
Resource
The resource follows the naming convention:
service::controller::action
For saving a localization key, the resource will be:
blocks-localization-api::key::save
Group
Set the group to:
localization
Description
(Optional) Add a description explaining what this permission allows.
Click Save to create the permission.
Assigning the Permission to a Role
After creating the permission:
- Navigate to Access Manager → Roles.
- Select the role associated with your client credential user.
- Locate the newly created permission.
- Add the permission to the role.
- Save the role configuration.
Once the permission has been added to the role:
- The client credential token will include the new permission.
- The API call to save a localization key will succeed.
- The application will now have the required authorization to perform the action.
Key Takeaway
When using client credentials to access Blocks OS APIs, always ensure:
- The credential has a role assigned.
- The role includes all required permissions for the target API endpoints.
Missing permissions will result in tokens that cannot access the required resources, even if authentication succeeds.
Steps to Add a Role
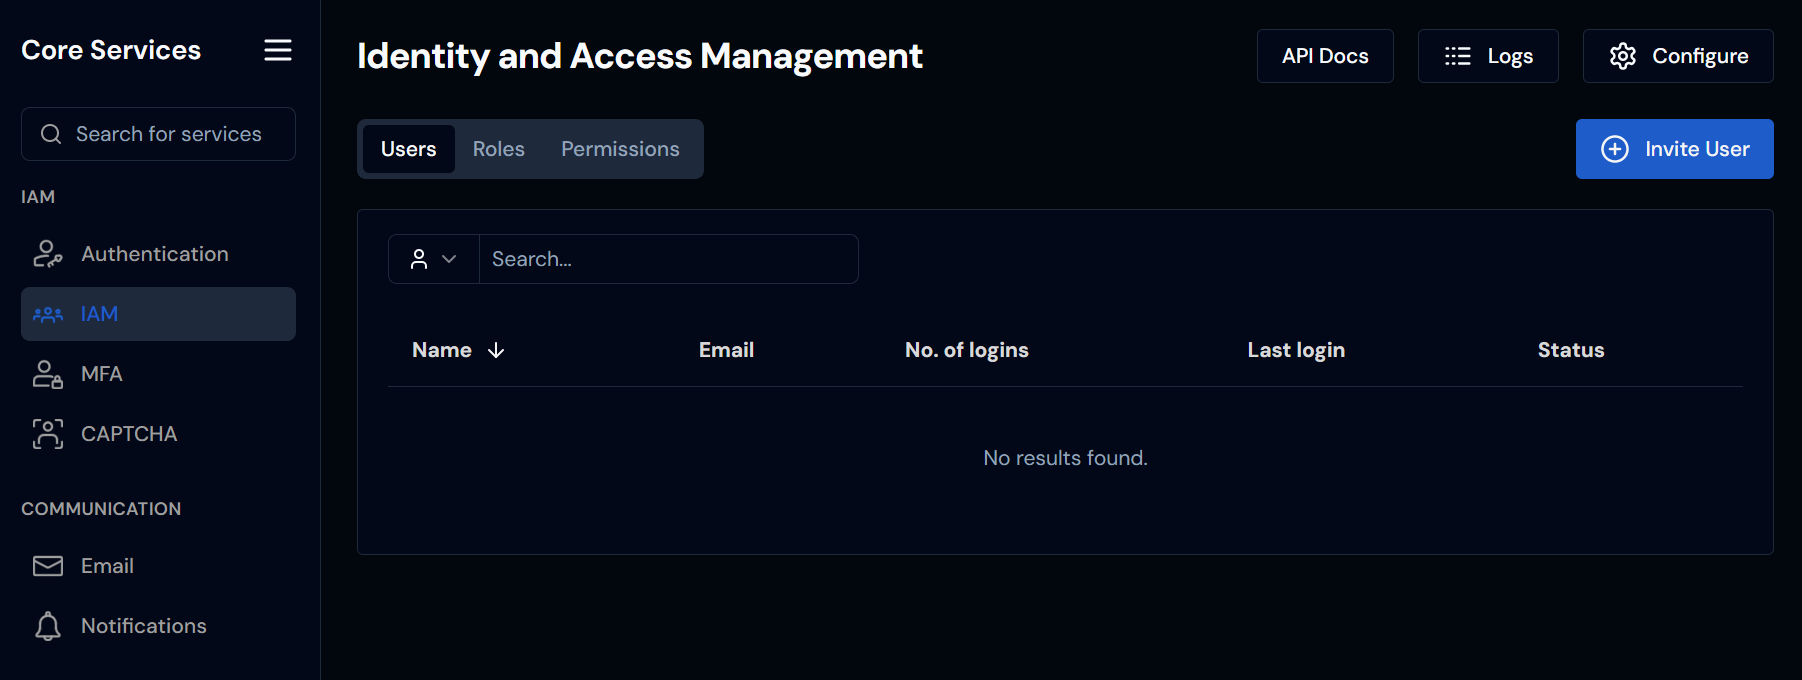
- Go to Core Services → IAM .
- By default, the Users tab will open.
- Select the Roles tab.
- Click the Add Role button.
- Enter the following details:
a. Role Name – e.g., Admin
b. Slug – e.g., admin
c. Description – Briefly describe what this role can do. - Click Add to save the new role.
Search Permissions
- Go to Core Services → IAM.
- Select the Permissions tab.
- In the search field , you can:
a. Search by permission name.
b. Filter by source using the dropdown (e.g., Built-in or Custom ).
c. Filter by type using the Type dropdown.