Secrets & Configs
Overview
Secrets & Configs is the central workspace for managing the settings and integrations used by services in a Blocks OS environment. From here, you can configure application domains, register services for observability, and manage authentication features such as OIDC, client credentials, external identity providers, CAPTCHA, and MFA. You can also configure the providers and credentials that power email, notifications, and storage, keeping each environment's service connections in one place.
My Service
My Services allow you to register and manage your services within Blocks OS. Once a service is registered, you can begin collecting logs and traces for it.
Key Features
- High Performance - Automatic batching reduces network overhead and improves throughput
- Automatic Retry Logic - Exponential backoff with configurable retry attempts
- Failed Batch Queue - Prevents data loss during transient failures
- Thread-Safe - Built with concurrent collections for multi-threaded environments
- OpenTelemetry Integration - Industry-standard distributed tracing support
- Multi-Tenant Support - Automatic tenant isolation via baggage propagation
- Zero Dependencies on Logging Frameworks - Works independently or alongside Serilog, NLog, etc.
- Azure Service Bus Native - Optimized for Azure Service Bus Topics and Subscriptions
- Easy Integration - Simple dependency injection set up with minimal configuration
Register a Service
- Navigate to My Services.
- Click Register Service.
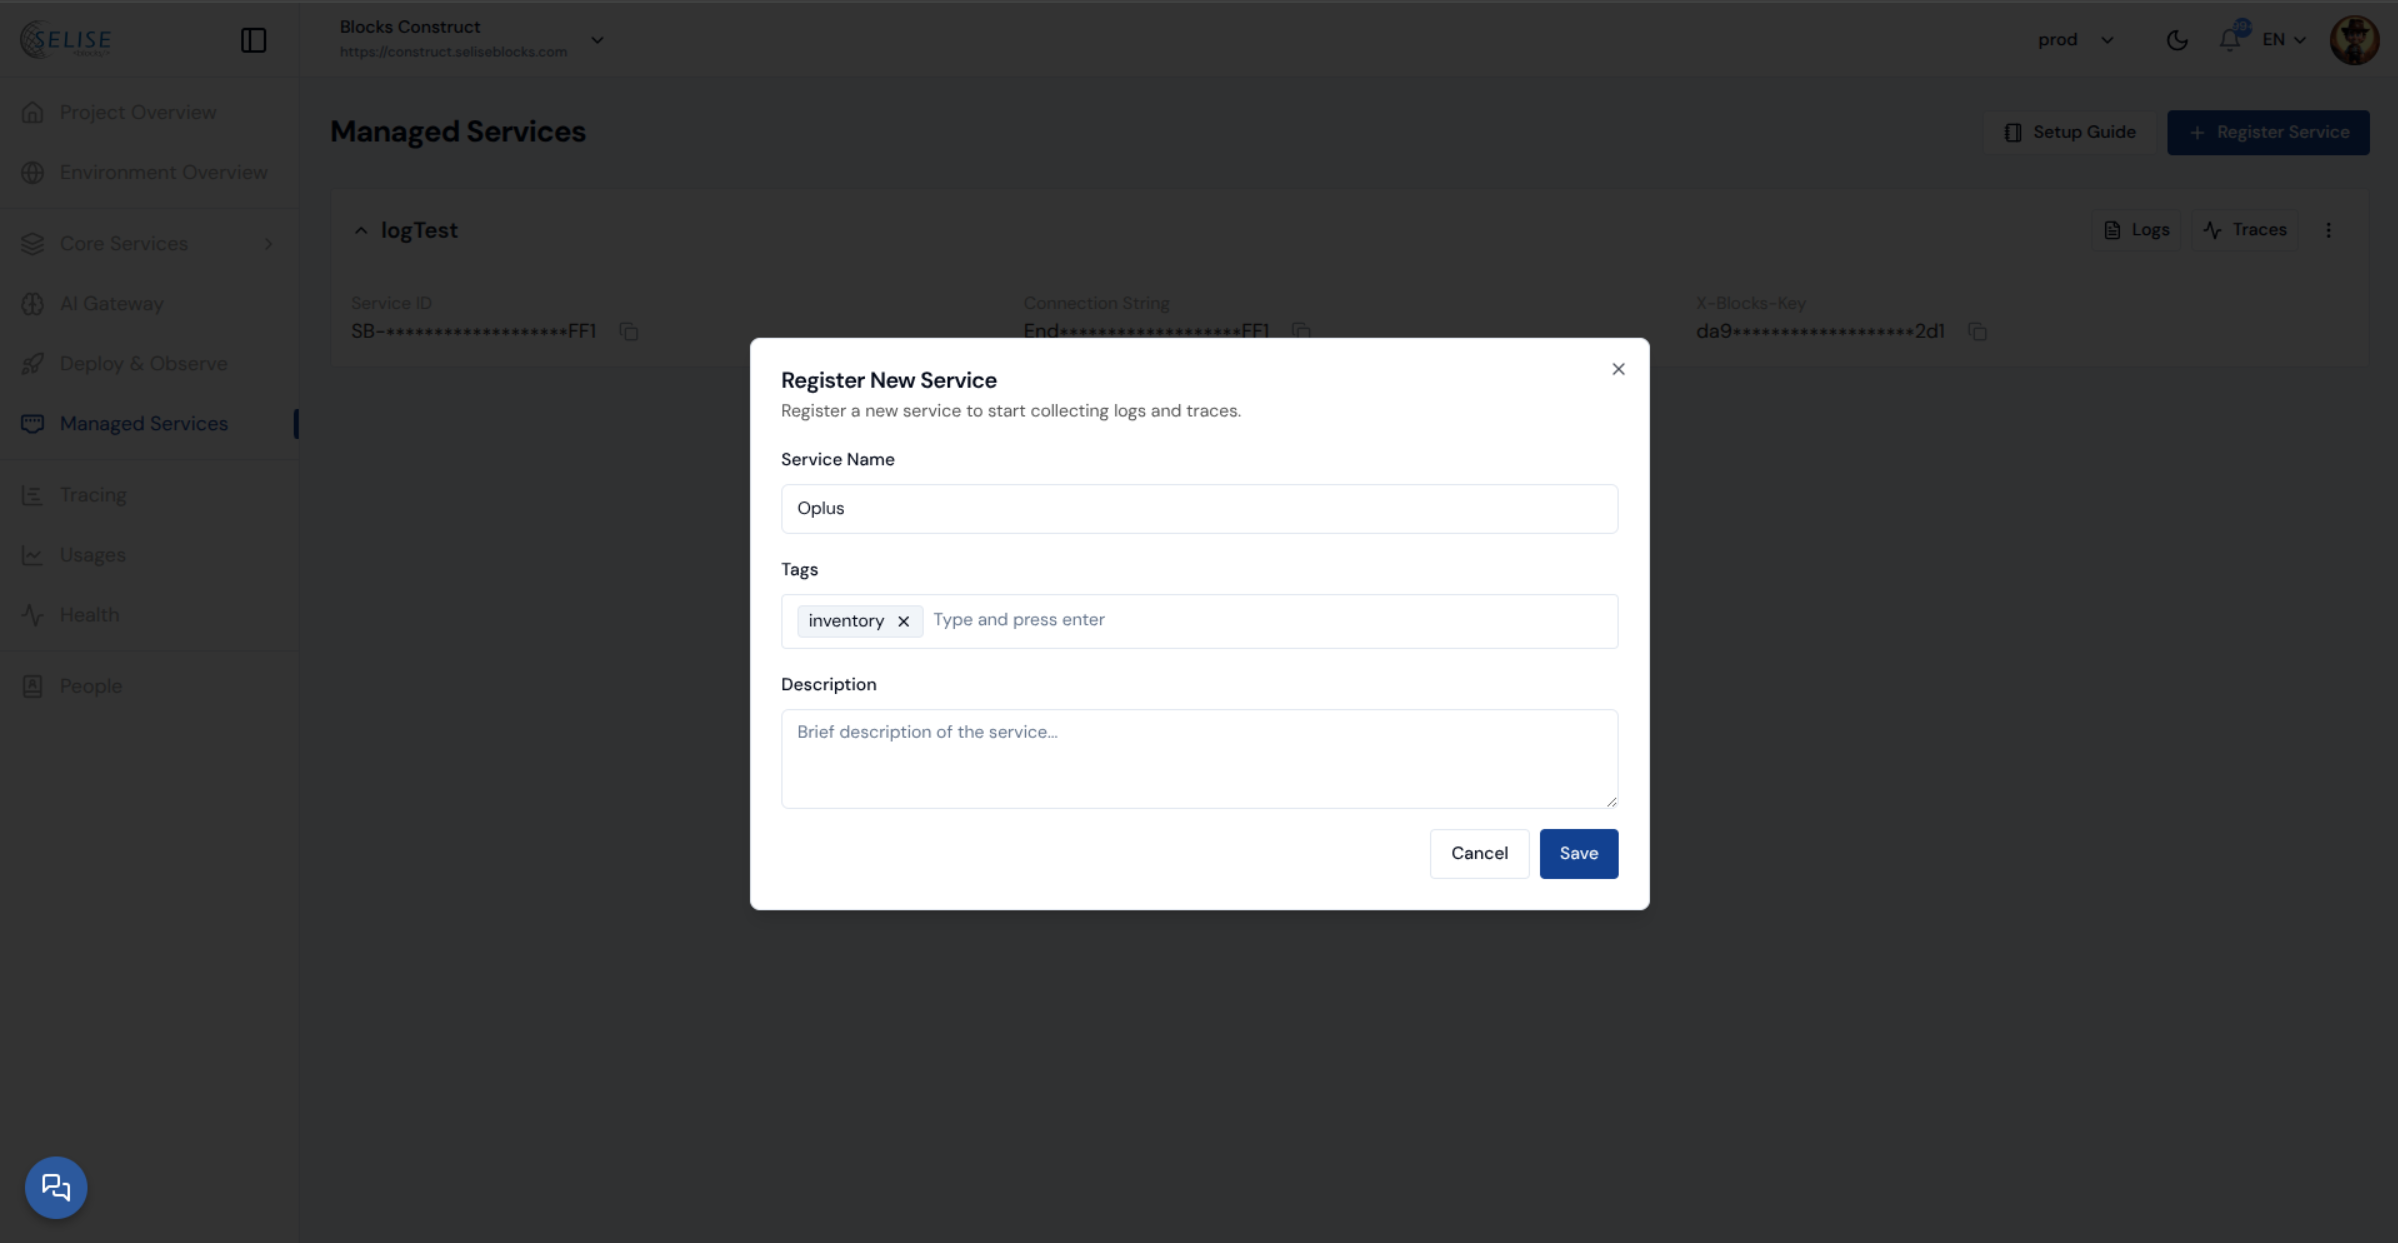
- Fill in the required details:
- Service Name: Enter the name of the service.
- Tags: Add relevant tags to categorize the service.
- Description: Provide a brief description of the service.
- Click Save to register the service.
- After registering, connect your application to the service using the provided NuGet package. Once connected, you can view logs and traces for that service directly in Blocks OS.
To set up My Services with your backend project, install our supported packages:
| Language | Package link |
|---|---|
| .NET | NuGet |
| Python | PyPI |
| NodeJS | NPM |
Monitor Your service
You can click on the three dots menu to set up a monitor for your service. To learn more, visit Monitor your Deployments
Configure your services. Visit My services
OIDC
If you integrate Blocks' OIDC into your app, then Blocks will handle your user's sign in, sign up, password reset, and all other authorization and authentication flows. Your consumer application will not need to impelment these.
The OIDC (OpenID Connect) feature in the Blocks OS Platform enables applications to authenticate users using Blocks as a centralized Identity Provider (IdP).
It works similarly to logging into an application using Google or Microsoft SSO — instead of managing authentication internally, the application delegates authentication to Blocks. Blocks verifies the user and securely returns authentication information to the client application.
This allows organizations to:
- Centralize authentication across multiple applications
- Improve security by reducing duplicate login systems
- Provide a seamless SSO experience across services
- Integrate third-party and Blocks applications with a single identity source
To start, click on "+ Create" button. give your client a name. The redirect URL must be an actual URL that your front end application has. It is usually <your-app-domain>/callback. If you are using Blocks to handle your IAM, click on "Register as a Blocks OIDC identity provider". This will create a corresponding entry in Identity Provider.
Once this is done, copy your Client Id and put it in your app. You will need it to initiate various processes like login. See the API reference
Client Credentials
Click on "Add" to create a new client credential. You can set your access token's lifetime. You activate or deactive client credential instances. You must assign a role to avoid authorization errors. Read this guide to get a token with your newly created client credentials.
External IdP
Configure an External Identity Provider (IdP) to allow users to log in using accounts from trusted systems such as Keycloak, Okta, Auth0, Azure, and other options.
Steps to Configure External IdP
- Go to Core Services → Authentication .
- On the landing page, open the External IdP tab.
- In the pop -up page, choose your preferred setup method:
If you select a provider such as Keycloak, Okta, Auth0, Azure:
- Enter the JSON Web Key Set (JWKS) URL.
- Enter the Issuer or audience if needed.
- Click Save to complete the configuration.
If you select Others:
- You can select Public URL and enter URL and password. Or, you can select Upload File and upload certificate (format: .crt, .pfx, .der and file size max 2 MB).
- Enter the Issuer or audience if needed in both cases.
- Click Save to complete the configuration.
Captcha
Overview
The CAPTCHA service adds an essential security layer to your applications by distinguishing real users from automated bots. By integrating CAPTCHA validation into your authentication flow, you protect your system from spam, credential-stuffing attempts, and other automated attacks. The platform supports industry-standard providers such as Google reCAPTCHA and hCaptcha, allowing you to choose the solution that best fits your security needs.
By default, no CAPTCHA configuration is set. It can be enabled in two ways.
Add CAPTCHA
For Google reCAPTCHA
- Go to the Google reCAPTCHA website.
- Enter your domain in the corresponding field.
- Click the Submit/Send button.
- Once registered, you will receive a Site Key and a Secret Key.
- Go to Core Services → CAPTCHA in Blocks OS under IAM section.
- Click Add Configuration.
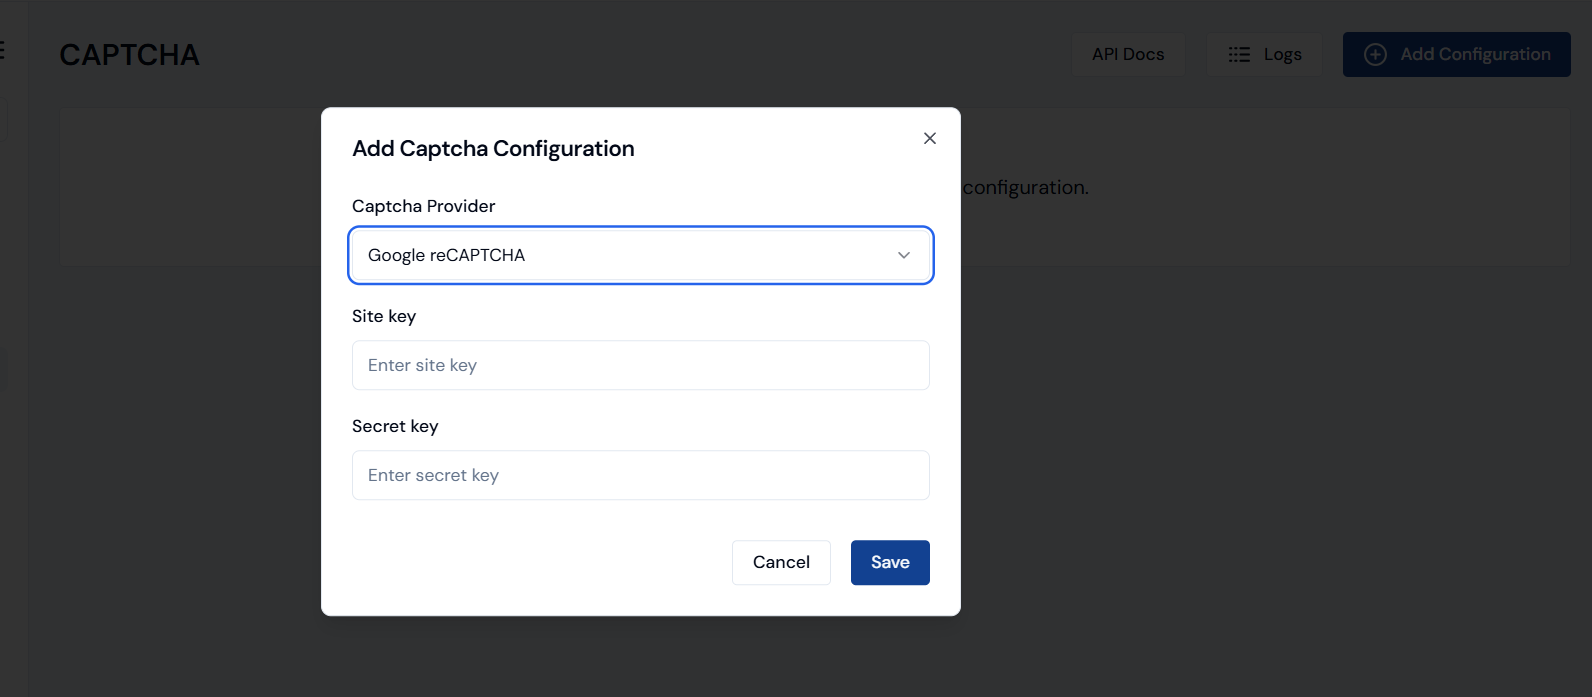
- Select reCAPTCHA from the dropdown menu.
- Enter the Site Key and Secret Key collected from Google.
- Click Save to complete the setup.
For hCaptcha
- Go to Core Services → CAPTCHA .
- Click Add Configuration .
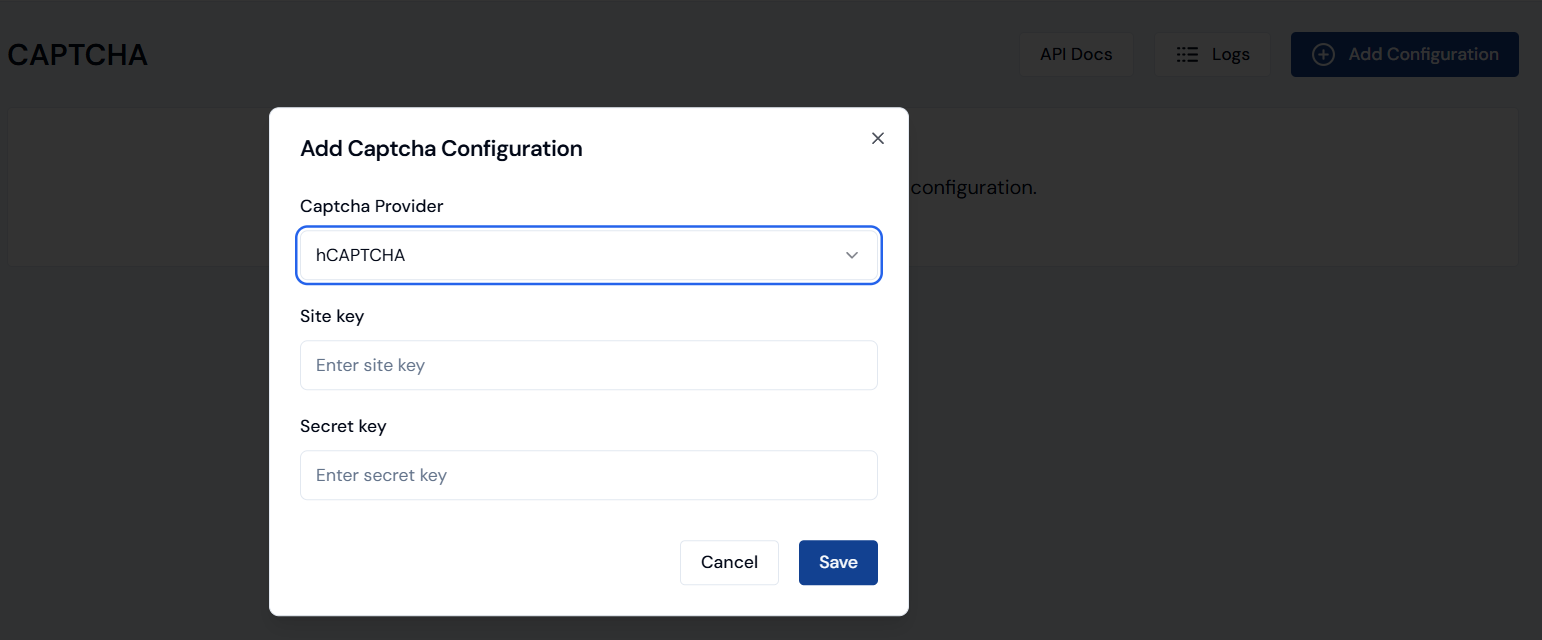
- Select hCaptcha from the dropdown menu.
- Enter the required Site Key and Secret Key .
- Click Save to apply the configuration.
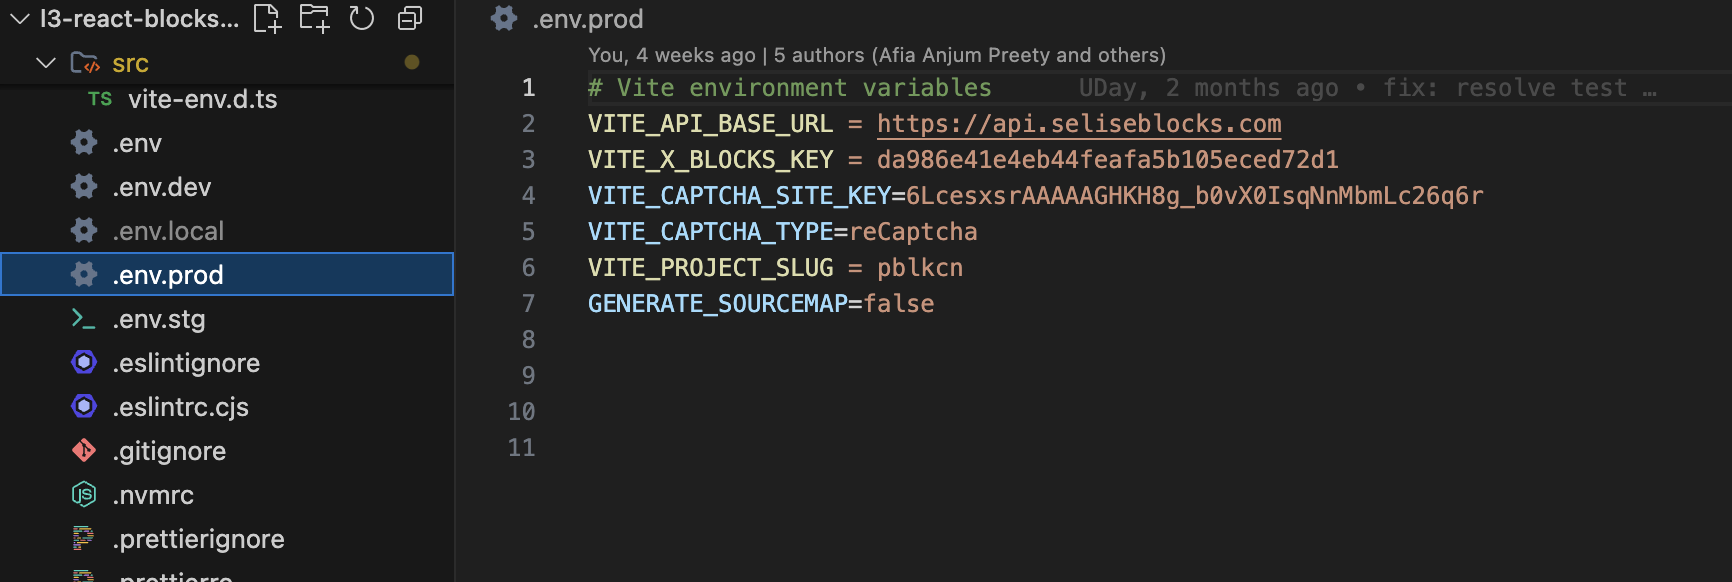
Add the Captcha Site Key and Captcha Type to your application's .env file so the frontend can load the configuration. A coding agent can do this for you with the blocks-captcha skill.
A single provider (e.g., reCAPTCHA or hCaptcha) can only be configured once.
Only one CAPTCHA can be enabled at a time.
MFA
Multi-Factor Authentication in Blocks OS is a key security capability designed to add an extra layer of protection to user accounts and your applications. By requiring users to verify their identity through multiple factors—such as email verification codes or authenticator apps—MFA significantly reduces the risk of unauthorized access, even if primary credentials are compromised.
The MFA service allows administrators to easily enable, disable, and manage various authentication factors directly from the IAM settings. Once enabled, users can configure their preferred MFA method from their individual profiles. Administrators also have full control over email templates used for MFA verification, ensuring a consistent and branded user experience.
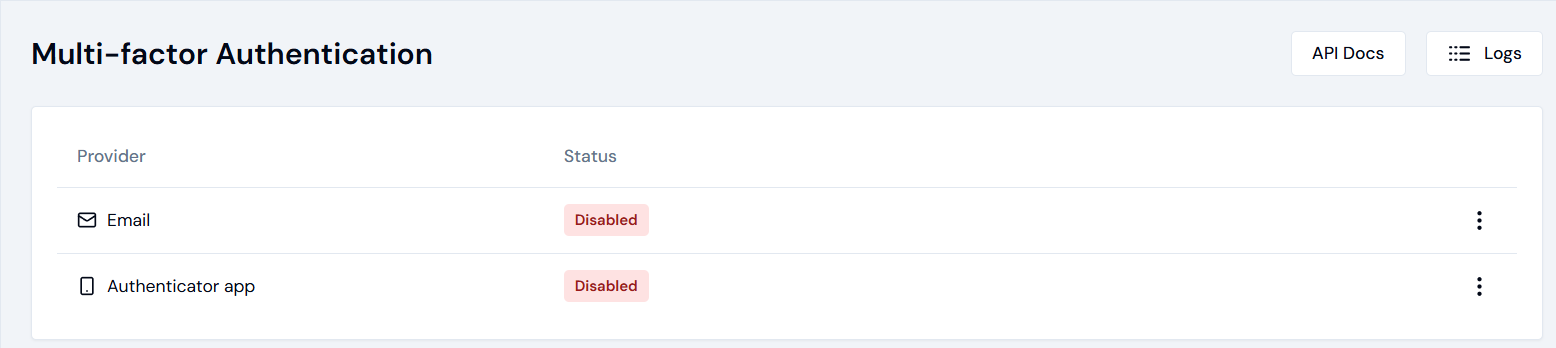
MFA is disabled by default
Enable or Disable MFA by Email
- Go to Core Services → MFA under IAM section .
- Click the three -dot menu beside Email .
- Select Enable to activate MFA via email.
→ Once enabled, users can configure MFA from their profile . - To disable , click the three -dot menu again and select Disable .
Edit Email Template
- Click the three -dot menu beside Email , then select Edit Template .
- Use the built -in rich text editor to modify and preview the email sent for MFA verification.
- Click Save to apply changes.
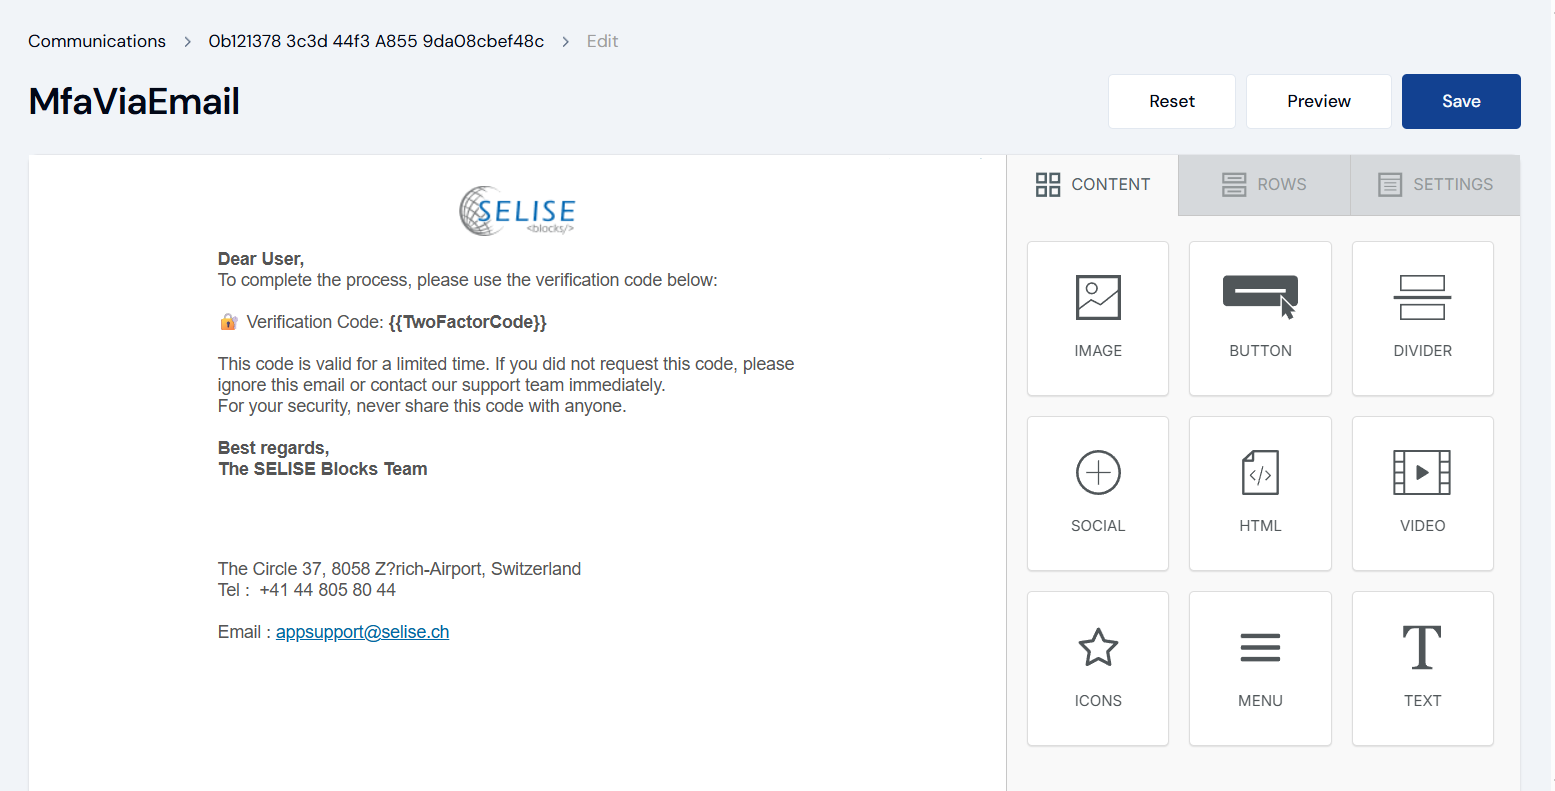
To learn more about email templates visit Email
Enable or Disable MFA by Authenticator App
- Go to Core Services → MFA under IAM section .
- Click the three -dot menu beside the Authenticator App
- Select Enable to activate MFA using an authenticator app (e.g., Microsoft Authenticator app ). After enabling, users can configure a one -time password (OTP) from their profile.
- To disable , click the three -dot menu again and select Disable . View Swagger link by clicking API Docs.
Email
Set Email Configuration
- Go to Core Services → Email. The Templates tab will open by default.
- Click the Configure button. This will take you to the Email Configuration page, where a default configuration is already set.
- To view the existing setup, click the Edit button next to the default configuration.
- To create a new configuration, click Add Configuration.
- Enter the required information such as:
a. Host details
b. Port
c. Username and password - Check the Enable SSL option if your mail server requires a secure connection.
- Click Save to create the new configuration.

Notification
Add a Notification Configuration
- Go to Core Services → Notification .
- Click the Add Configuration button.
- Enter a Name for the configuration (e.g., User Activity Alert ).
- Select the Channel to Notify — currently, the available option is SignalR .
- Choose the Notification Type from the dropdown.
- Enter the Notify Method (e.g., language import ).
- Check Enable Persistence if you want the notification to be stored for future
reference.
→ Persistent notifications will appear under the bell icon in the UI. - Click Save to create the configuration.
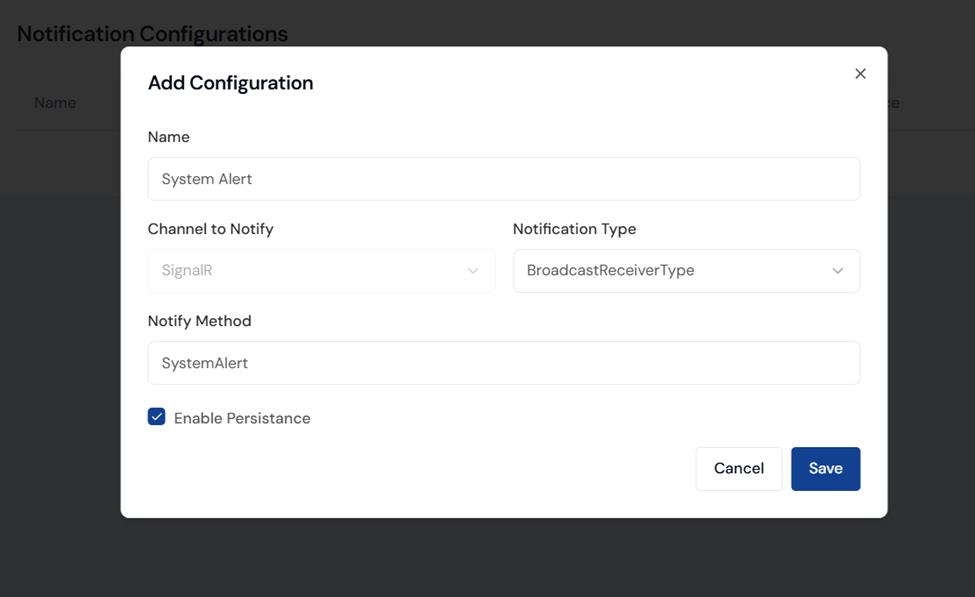
Available Notification Types:
| Type | Meaning |
|---|---|
| NoReceiverType | No receiver defined; notification not sent to anyone |
| BroadcastReceiverType | Sent to all users in the environment or system |
| UserSpecificReceiverType | Sent to specific user(s) only |
| FilterSpecificReceiverType | Sent to users matching certain filters or conditions (e.g. role, project) |
Edit or Delete a Notification Configuration
- Go to Core Services → Notification .
- From the Notification Configuration table, click the three-dot menu beside your desired configuration.
- Select Edit to modify settings (same fields as in Add Configuration).
- Select Delete to permanently remove the configuration.
Storage
Add Storage Configuration
- Navigate to Core Services → Storage .
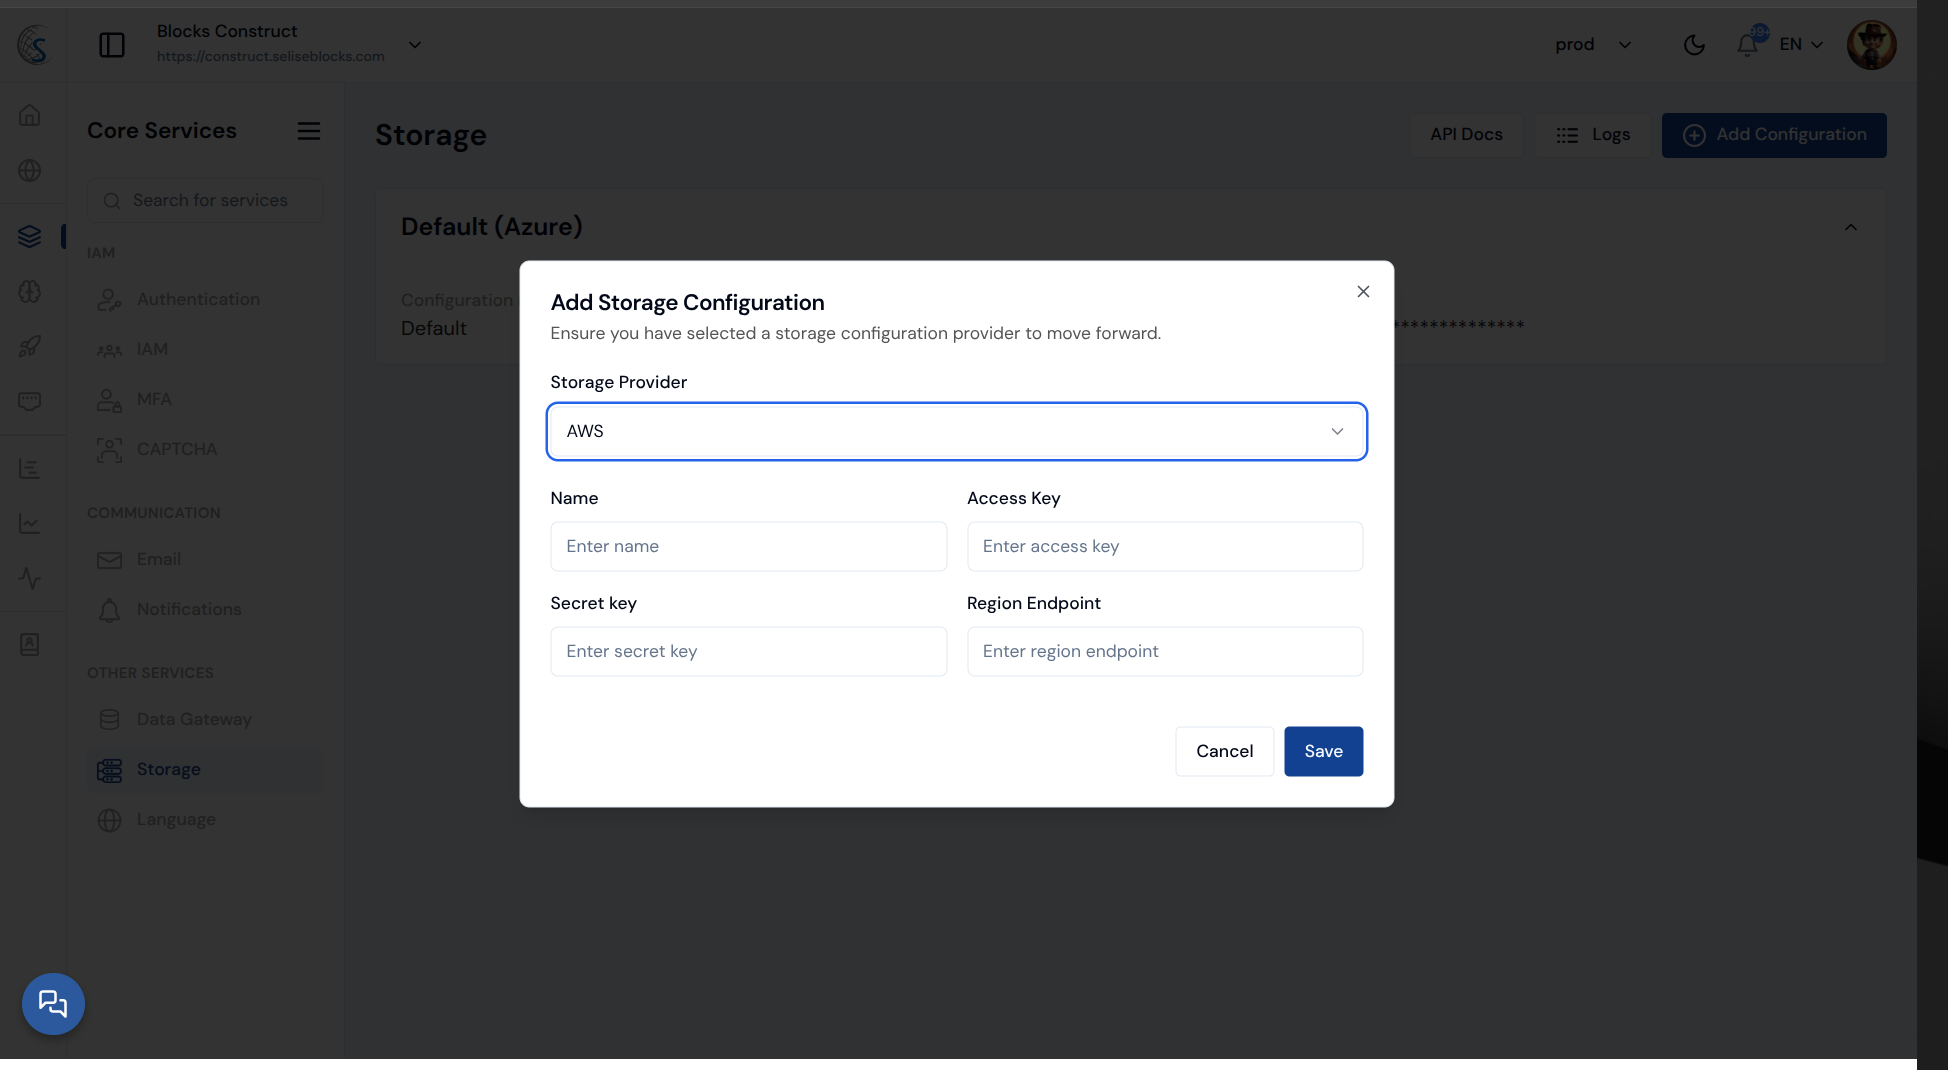
- Click Add Configuration (top-right corner).
- In the Add Storage Configuration popup:
a. Select a Storage Provider.
b. Fill in the required fields.
c. Click Save to confirm.
When you select AWS , you’ll need to provide:
- Name — a unique name for your configuration.
- Access Key and Secret Key — your AWS credentials.
- Region Endpoint — your AWS region (for example, us-east-1).
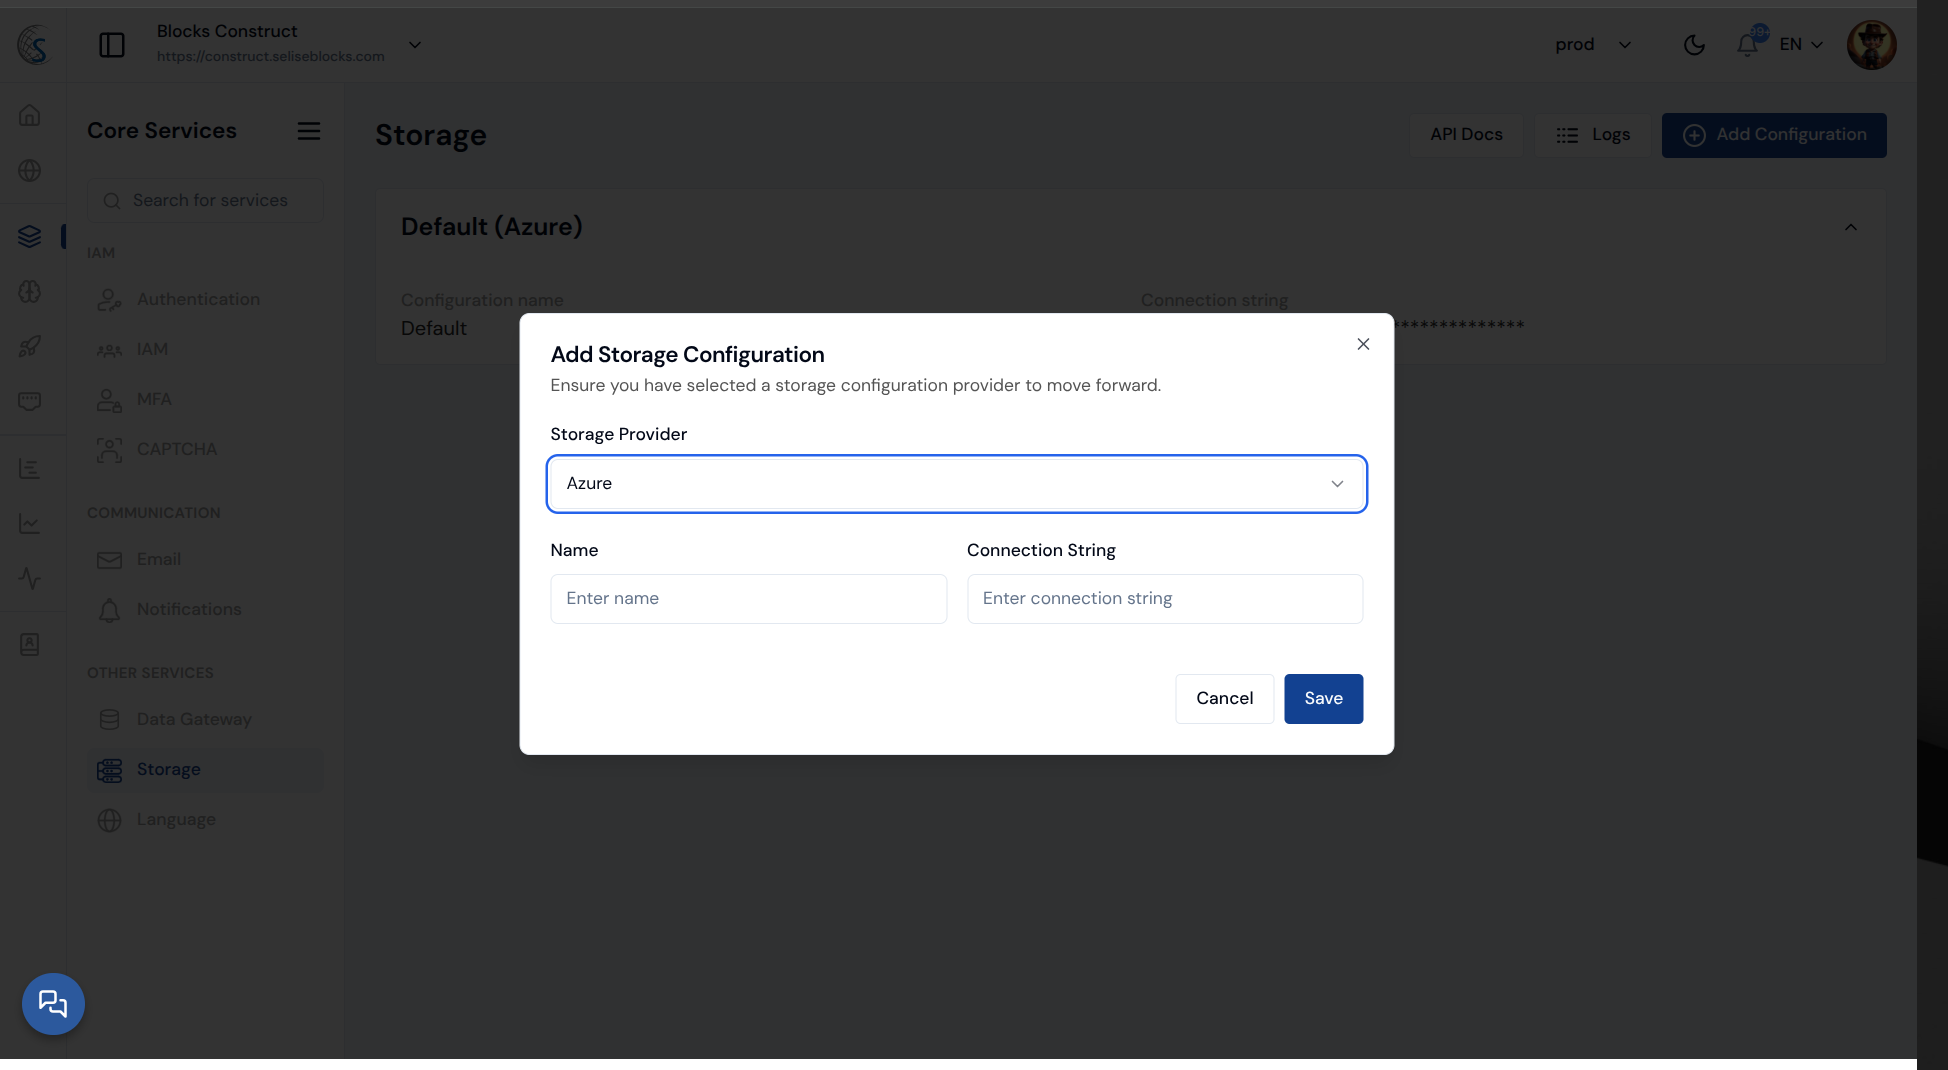
When you select Azure , you’ll need to provide:
- Name — a unique name for your configuration.
- Connection String — the full connection string from your Azure storage account.
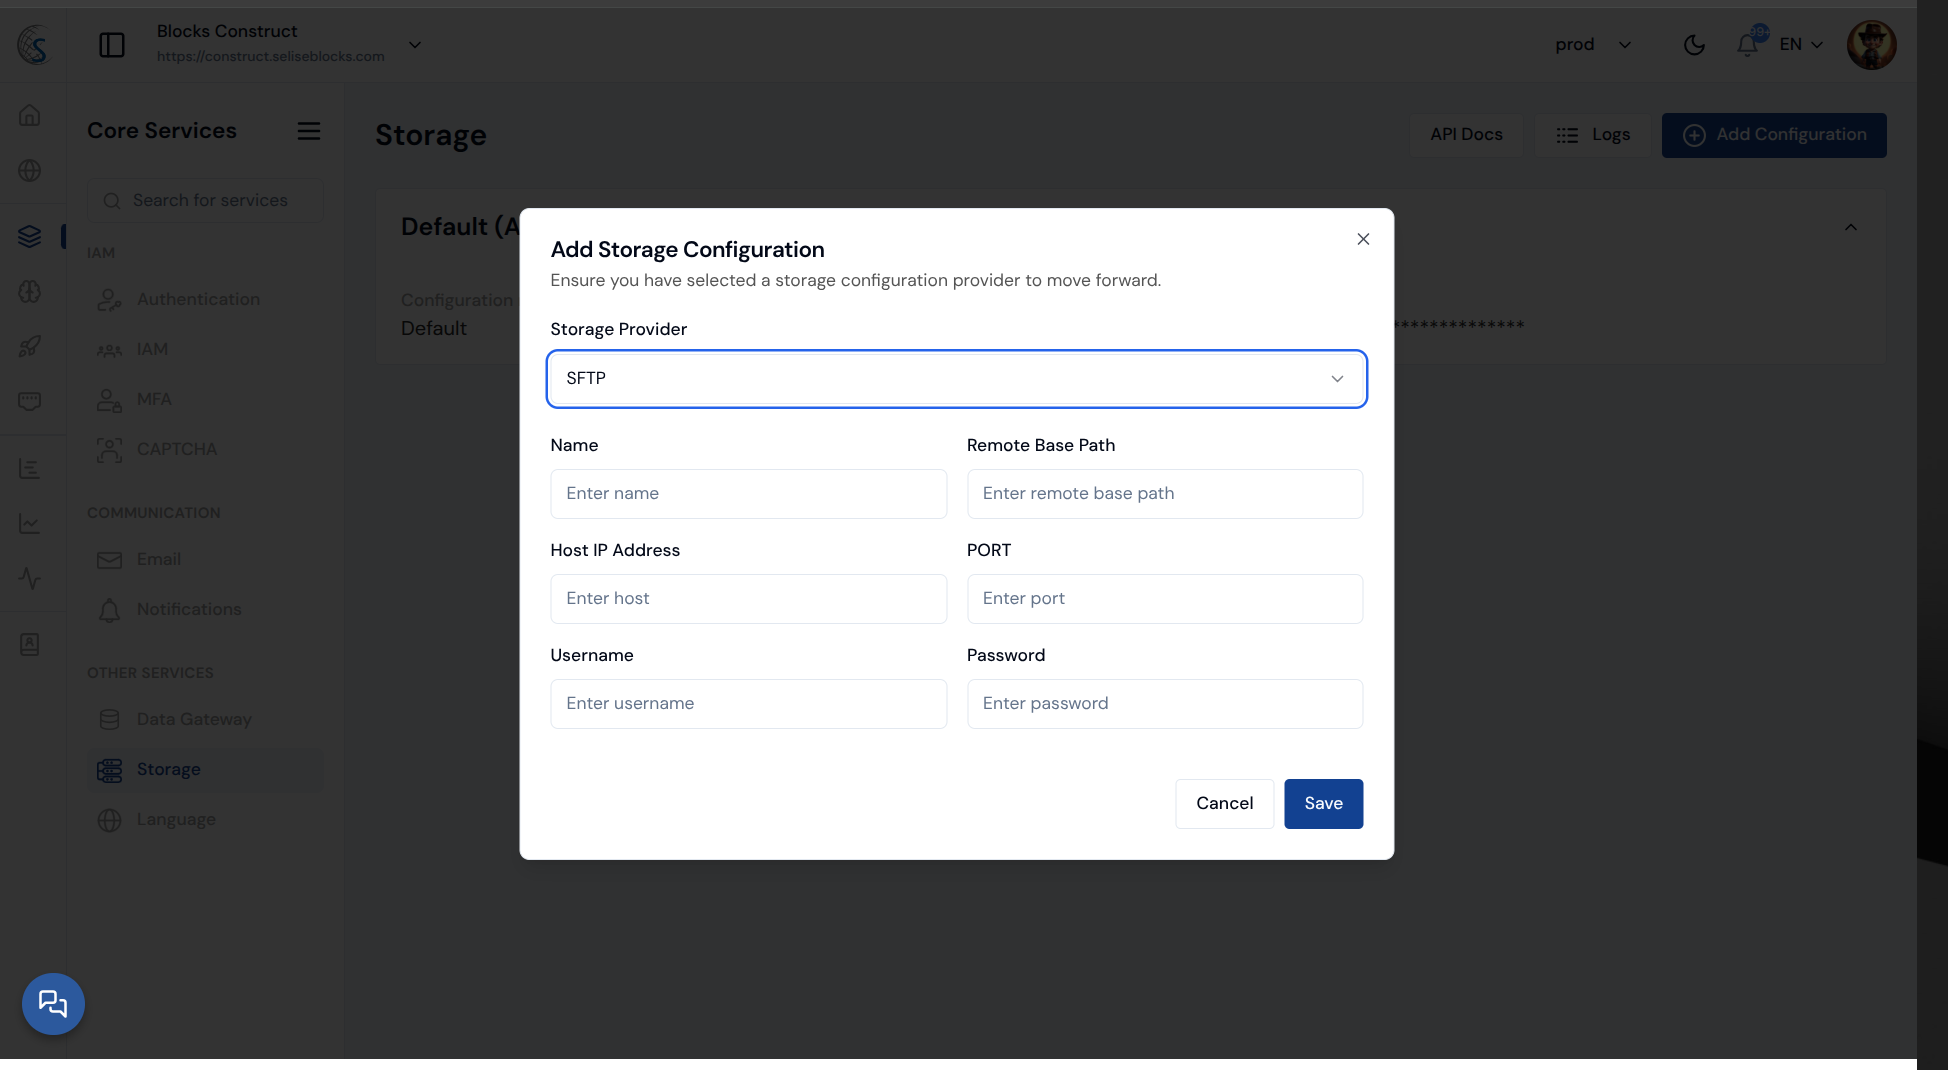
When you select SFTP , you’ll need to provide:
- Name — a unique name for your configuration.
- Remote Base Path — the root folder path on your SFTP server.
- Host IP Address and Port — where your server is hosted.
- Username and Password — your SFTP login credentials.
- This connects your custom SFTP server for file uploads.
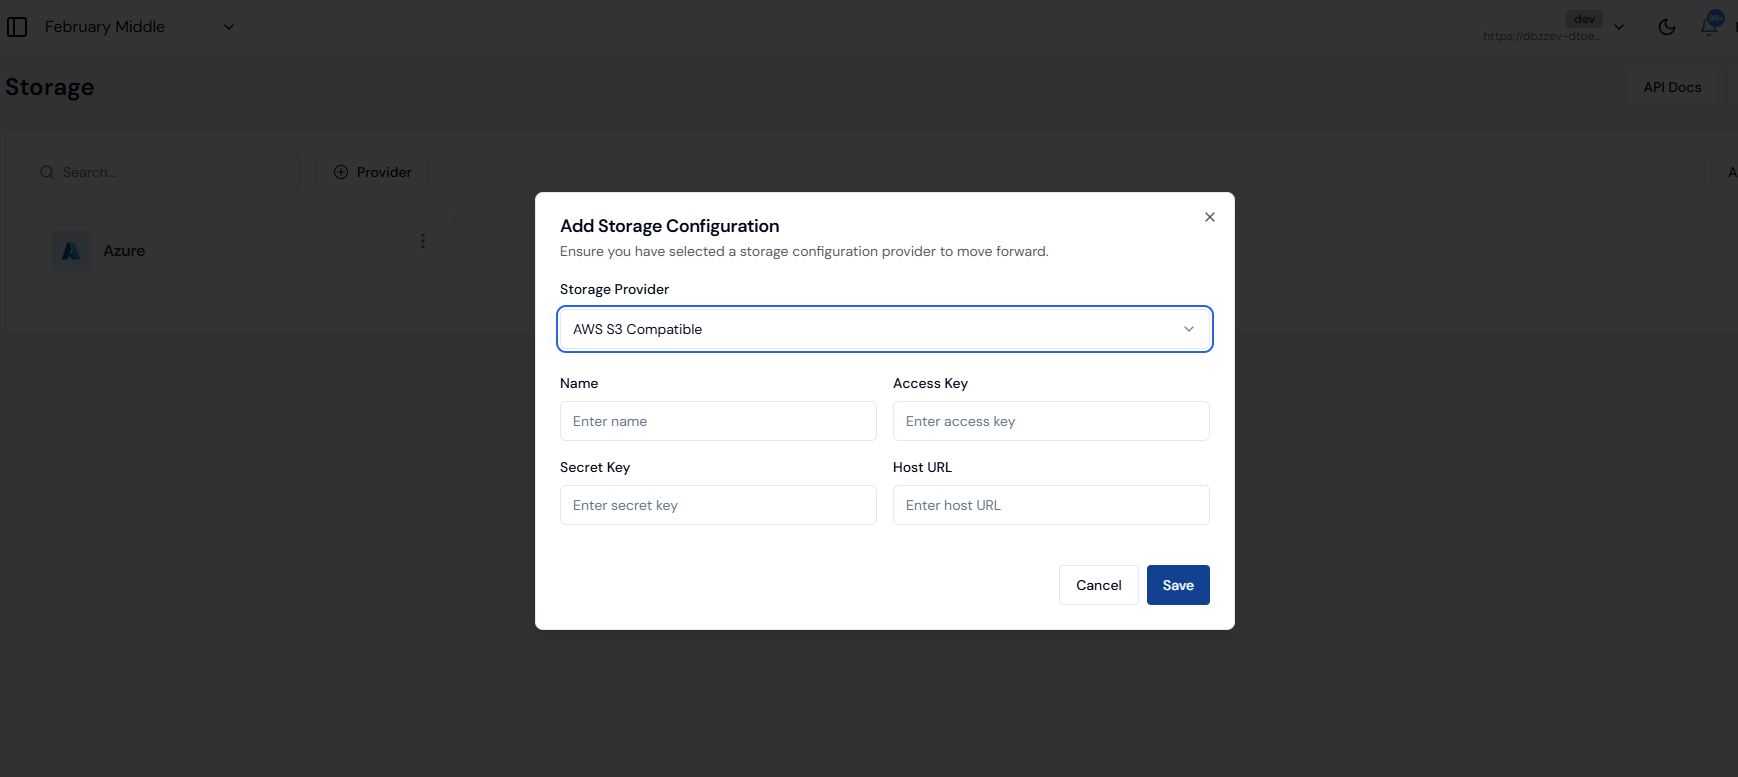
When you select AWS S3 Compatible, you’ll need to provide:
- Access Key — The credential used to authenticate your application with the storage provider.
- Secret Key — The credential paired with the Access Key, used to securely authorize access.
- Host URL — The endpoint address of the S3-compatible storage service where your files will be stored.
- This connects your application to the storage service for file uploads
The default configuration cannot be edited or deleted.
Use Storage Configuration
Once your storage configurations are set up, you can use them to upload and retrieve files through the Storage API.